Create a Tour
Quick answer
Go to Tours → My Tours, click Create a Tour, then follow the wizard: choose a tour type, name it and pick devices, and select languages. Click Create Tour to finish — AI tours add one more step for generation. A Start Stop is created automatically.
Create a new audio tour in the Platform to start building stops, adding audio content, and configuring languages. The tour creation wizard guides you through the process in a few steps.
Video: from an empty site to a published tour
Section titled “Video: from an empty site to a published tour”Transcript
- Let's create a new audio tour. In My Tours, click Create a Tour.
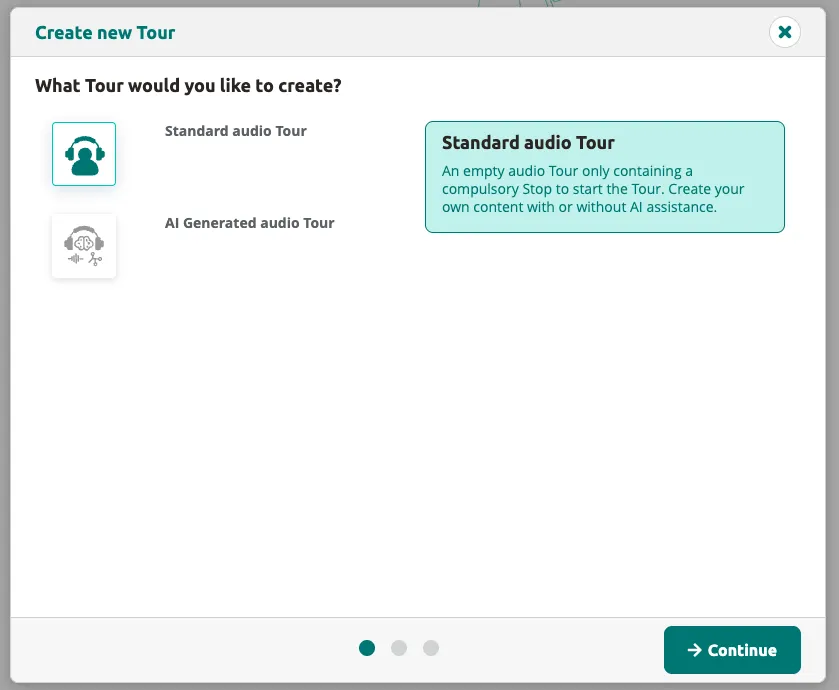
- Choose a standard audio tour, and continue.
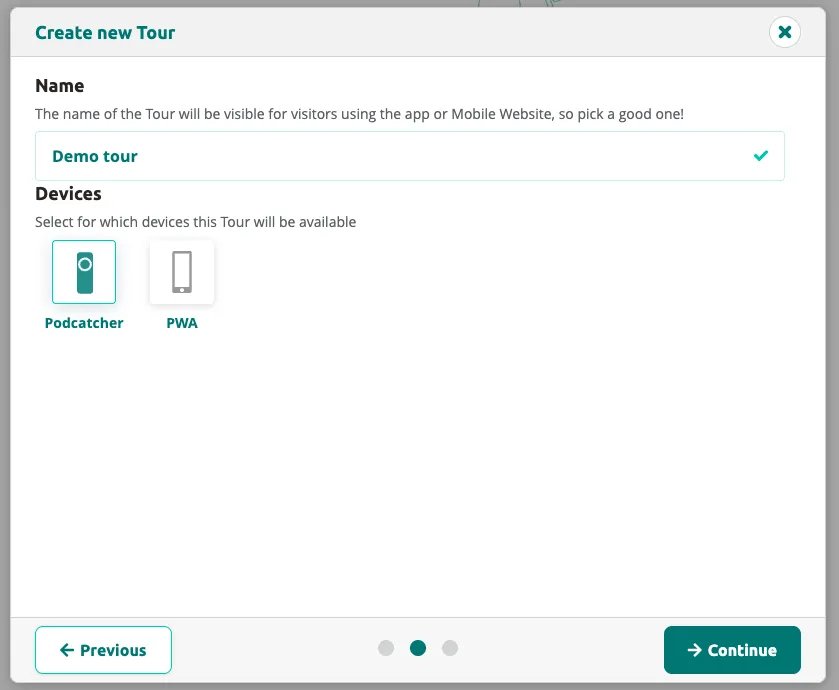
- Give your tour a name. Visitors will see this name.
- Choose where it's available: on the Podcatcher, on visitors' own phones through the web app, or both.
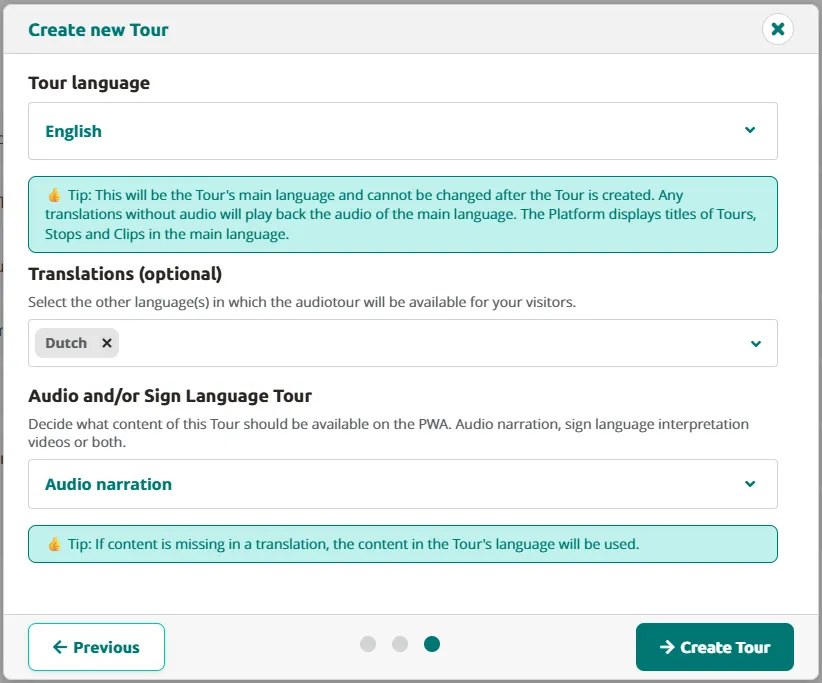
- Pick the main language of the tour. You can add translations now, or later.
- Click Create Tour, and the tour editor opens.
- On the left are the stops of your tour. Every tour begins with a start stop.
- Click Add Stop, and give your first stop a title.
- Now write the text for this stop. Visitors can read it, and it is used to create the audio.
- Need help writing? Ask AI can draft the text for you.
- No recording yet? Choose Text to speech, pick a voice, and generate the audio.
- The audio is ready, and everything you do is saved automatically.
- When you're happy with your tour, open Publishing options.
- Publish makes the tour available to your visitors. Publish and Sync also sends it straight to your Basecamps.
- Publishing takes a few moments.
- Back in My Tours, you can see the status of every tour at a glance.
- And that is it: your first tour is live.
The tour creation wizard
Section titled “The tour creation wizard”Step 1: Choose Tour Type
Section titled “Step 1: Choose Tour Type”-
Go to Tours in the left-hand menu.
-
Click
Create a Touron the My Tours page.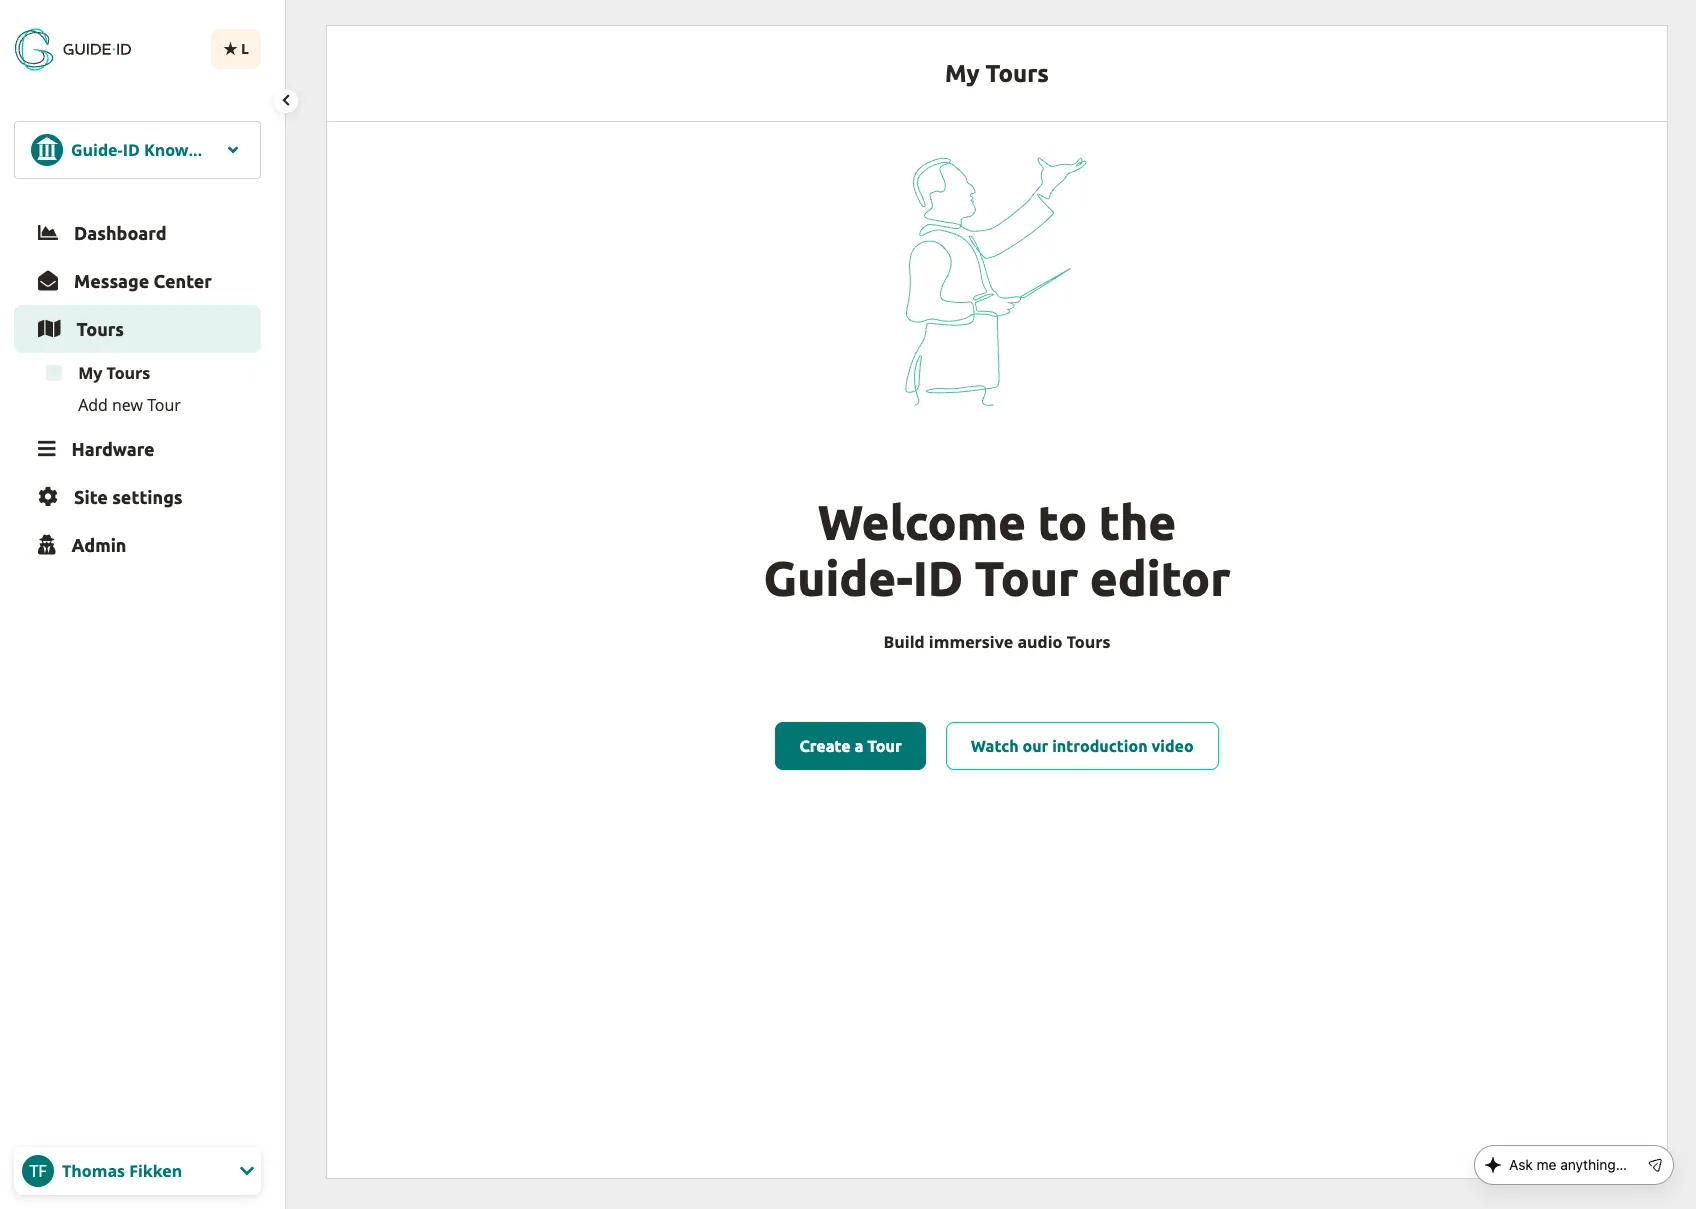
-
Select your tour type:
- Standard audio tour — build your tour manually with full control over every stop
- AI Generated audio tour — let AI generate stop names and content for you (see Creating Tours Using AI)
Step 2: General Tour Info
Section titled “Step 2: General Tour Info”-
Enter a Name for your tour.
-
Select the target Devices your tour should be available on (Podcatcher Pro, PWA, or both).
-
Click
Continue.
Step 3: Tour Languages
Section titled “Step 3: Tour Languages”-
Select the main Tour language for your tour.
-
Optionally, choose additional translation languages if you want to provide translations for your visitors.
-
If PWA is selected as a target device, you can choose between:
- Audio narrations only
- Sign language only
- Both audio narrations and sign language
-
Click
Create Tourto finish a Standard tour. For an AI Generated tour, clickContinueinstead — this adds one more step where you set the AI generation options (see Creating Tours Using AI).
After Tour Creation
Section titled “After Tour Creation”Your tour is now created and ready for content. For standard tours, a Start Stop is automatically added with default text in your selected main language, and Text-to-Speech auto-generates the initial audio.
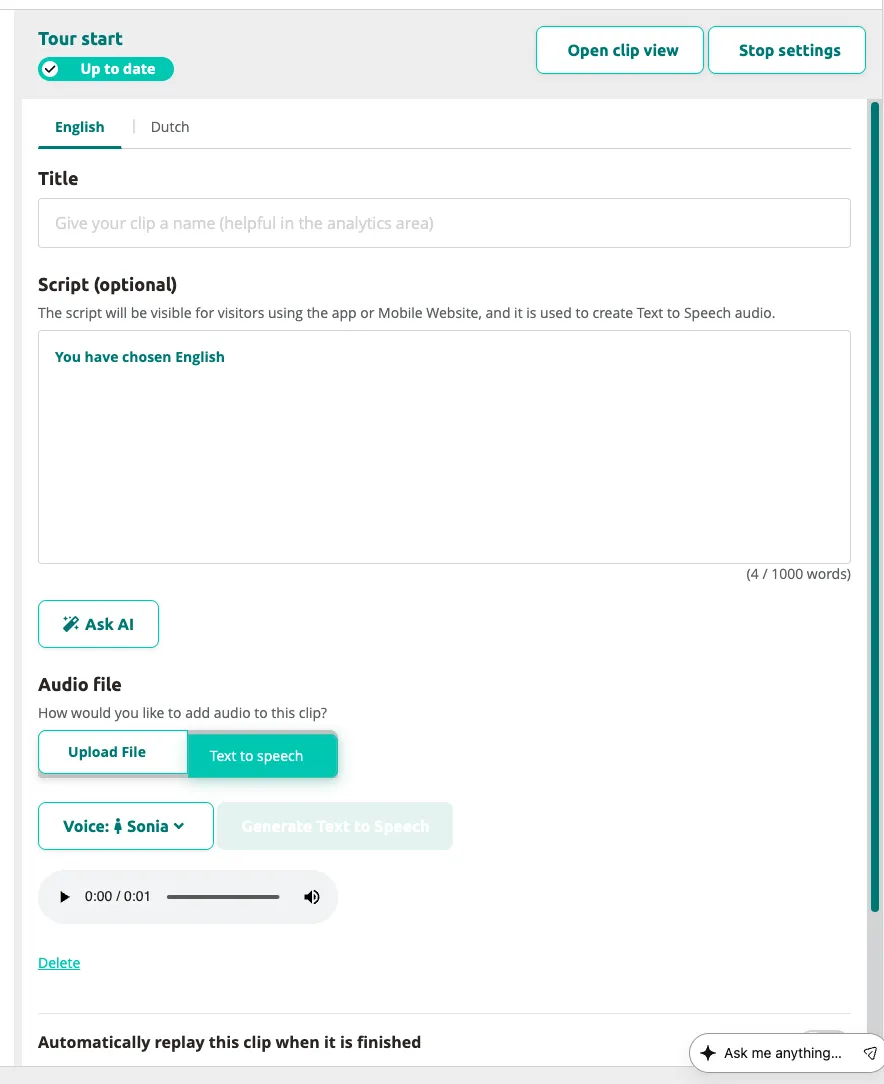
You can edit the tour name, devices, and languages at any time via Tour Settings.
Next: Adding Content to a Tour
Related articles
Section titled “Related articles”- Adding Content to a Tour — add audio and translations to your stops
- Using the Tour Editor — build interactive Clipflows with branching paths
- Adjusting Tour Settings — change devices, languages, and scoring
- Creating Tours Using AI — let AI generate your tour content